Preview environments with Gitea, Drone and Netlify
Published at 2021-11-14
For the Vikunja frontend I wanted to have a preview link with the changes from a PR, right under that PR. As a reviewer, that makes it a lot easier to see if the changes someone proposed actually work.
Vikunja’s frontend is a classic Vue 3 SPA where you get a js bundle at the end.
Gitlab has a feature called Review Apps where you basically define a pipeline stage (using gitlab CI, of course) that deploys the app somewhere and sets a dynamic url. They then pick up that url from the pipeline and give you a nice button to click on right in the PR.
Gitea does not have that, so I went and put it together myself.
Drone
We’re already using Drone CI for a bunch of things like building, testing, linting and releasing. For each PR Drone runs a few pipelines to give us quick feedback about the impact of the changes. In that pipeline, a pipeline builds the frontend. Since the frontend is just a classic SPA, we get a bundle of css, js, images and so forth at the end of that build.
Surely we can just throw that on some host, make it available under a dynamic url and call it a day?
Enter Netlify.
Netlify
Netlify is a service that lets you host static content (like an SPA), served with a global CDN. They have a premium offering with a few additional features, but the free offering works great.
Their main selling point is automation: Just push to your git repo, and they will build and deploy your site.
There’s integrations for the common git services like GitHub, Gitlab etc. No option for Gitea though.
What makes this really work in Vikunja’s case is the manual option which only deploys something already built and does not hand over the build process to Netlify. That allows us to use the bundle already built by the Drone pipeline.
Deploy Previews
Netlify has a feature called “Deploy Previews” where they deploy your site under a vanity url for you to view the changes.
You can use this manually by running netlify deploy in your source code repo, it will deploy the code to a preview url by default.
The GitHub integration offers deploy previews per PR which is pretty much what we need.
We’re going to replicate that on our self-hosted Gitea instance.
Netlify setup
To get started with Netlify, you need to tell it a few things. To do that, I created a file called netlify.toml with this content:
[build]
  command = "yarn build"
  publish = "dist"
This tells Netlify to deploy the contents of the dist folder whenever running netlify deploy.
We’ll use this to deploy the site as part of our build pipeline.
To check if everything works, run netlify deploy in your repo. You’ll likely have to set up the connection to your
Netlify account.
Automatically deploying changes from a Drone build step
To automatically deploy the code from drone, I added this pipeline step:
- name: deploy-preview
  image: node:16
  pull: true
  environment:
    NETLIFY_AUTH_TOKEN:
      from_secret: netlify_auth_token
    NETLIFY_SITE_ID:
      from_secret: netlify_site_id
    GITEA_TOKEN:
      from_secret: gitea_token
  commands:
    - node ./scripts/deploy-preview-netlify.js
  depends_on:
    - build-prod
  when:
    event:
      include:
        - pull_request
Going over it step by step:
- Running in a node 16 container.
- All secrets are passed in via environment variables coming from Drone secrets. You need the following:
netlify_auth_token- You need to create a new personal access token at the user settings page.netlify_site_id- The ID of the site you’re creating preview deployments for. You can get that by runningnetlify sites:listin your repo.gitea_token- Another personal access token of a Gitea user, required to write a comment with the preview url under the PR. I recommend creating a bot account for this.
- Depends on the
build-prodstep which builds a production bundle of Vikunja’s frontend. - The actual pipeline step just runs a node script. We’ll get to the contents of that in a minute.
- To make sure it will only create a deployment preview for pull requests, I added a
whentrigger to do just that.
The script
As of now, this is our script to deploy the changes:
const slugify = require('slugify')
const {exec} = require('child_process')

const siteId = process.env.NETLIFY_SITE_ID
const branchSlug = slugify(process.env.DRONE_SOURCE_BRANCH)
const prNumber = process.env.DRONE_PULL_REQUEST

const alias = `${prNumber}-${branchSlug}`

const promiseExec = cmd => {
  return new Promise((resolve, reject) => {
    exec(cmd, (error, stdout, stderr) => {
      if (error) {
        reject(error)
        return
      }

      resolve(stdout)
    })
  })
}

(async function () {
  let stdout = await promiseExec(`./node_modules/.bin/netlify link --id ${siteId}`)
  console.log(stdout)
  stdout = await promiseExec(`./node_modules/.bin/netlify deploy --alias ${alias}`)
  console.log(stdout)
})()
This does a few things:
First, it creates an alias for the deployment. This gives us a nice url like 123-branch-name--vikunja-preview.netlify.app.
By default, Netlify creates a deployment based on some content hash. Using the alias lets us create an url that does
not change per PR. We’re creating a slug from the branch name using slugify to
make sure the branch name actually works as a subdomain name.
PR number and branch name are automatically populated by Drone as env variables which we can access with node’s
process.env.VARIABLE_NAME.
After the alias is done, we need to tell Netlify what site we want to deploy. That’s done using the netlify link --id {id}
command, passing in the site ID as a parameter from env (remember the settings in the drone step?).
The last thing to do is to actually deploy the content with the netlify deploy --alias {alias} command, passing the
alias we created earlier as a parameter.
If all works as expected, we now have preview deployments on Netlify with a nice url!
URL comment
While Gitea shows you the pipeline status in the PR and lets you view the pipeline output with a single click, opening the pipeline and searching for the preview url in the step output is not exactly great UX. What we want is a bot that creates a comment with the url of the deployment under the PR.
To do that, we extend the script from earlier:
// ...
const axios = require('axios')
// We need the user id of the bot to prevent multiple comments as the PR gets updated
const BOT_USER_ID = 123
// The gitea token from the pipeline settings
const giteaToken = process.env.GITEA_TOKEN
// Branch slug, PR number etc. Most of it is already used for the actual deployment
const branchSlug = slugify(process.env.DRONE_SOURCE_BRANCH)
const prNumber = process.env.DRONE_PULL_REQUEST
const alias = `${prNumber}-${branchSlug}`
// The second, hard coded part of this url is something you need to set in Netlify's site settings.
const fullPreviewUrl = `https://${alias}--vikunja-frontend-preview.netlify.app`
const prIssueCommentsUrl = `https://kolaente.dev/api/v1/repos/vikunja/frontend/issues/${prNumber}/comments`
// ...
(async function () {
// ...
// Here we get all comments though Gitea's API to see if there's already a comment from our bot
const {data} = await axios.get(prIssueCommentsUrl)
const hasComment = data.some(c => c.user.id === BOT_USER_ID)
if (hasComment) {
console.log(`PR #${prNumber} already has a comment with a link, not sending another comment.`)
return
}
// Once we arrive here we know for sure there's no other comment yet. That means we can proceed to post one.
await axios.post(prIssueCommentsUrl, {
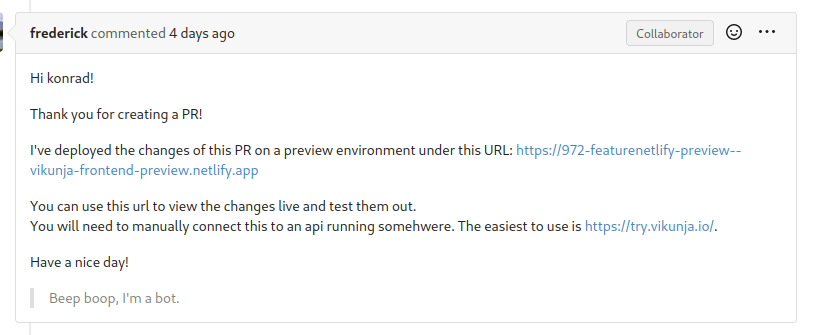
body: `
Hi ${process.env.DRONE_COMMIT_AUTHOR}!
Thank you for creating a PR!
I've deployed the changes of this PR on a preview environment under this URL: ${fullPreviewUrl}
> Beep boop, I'm a bot.
`,
}, {
headers: {
'Content-Type': 'application/json',
'accept': 'application/json',
'Authorization': `token ${giteaToken}`,
},
})
console.log(`Preview comment sent successfully to PR #${prNumber}!`)
})()
The script does two things: First, it checks whether a comment by the bot already exists to prevent spamming the PR with comments for every update that gets made to it. If there’s no comment yet, we post one with a nice message and the preview url. You might need to change that if your bot also comments other things, right now we only check based on the user id of the bot.
We’re using the excellent axios library here to do the http calls to Gitea’s API
as fetch is not available in node js.
Et voila:
You can check out the full script in the frontend git repo.
Robots
To prevent crawlers and other robots from accessing and indexing the preview deployments, we add the following to the
netlify.toml config file in the frontend repo:
[[headers]]
  for = "/*"
  [headers.values]
    X-Frame-Options = "DENY"
    X-XSS-Protection = "1; mode=block"
    X-Robots-Tag = "noindex"
This sets a X-Robots-Tag header with a value of noindex for all paths of the site which should prevent bots from
accessing the preview deployments.
Rewrites
The Vikunja frontend needs to answer every request and does all routing on the client side. For that to actually work,
you’ll need to tell Netlify to redirect every request to the index.html file.
To do this, just add this to your netlify.toml file:
[[redirects]]
  from = "/*"
  to = "/index.html"
  status = 200
Wrapping up
This was a nice and simple way to get deployment previews on your Gitea instance. Even though Netlify did most of the heavy lifting (seriously, I’ve done all of this manually in the past, and it’s quite a bit more work), the glue code in between that adds the comment is what makes this truly amazing in my opinion.
And it’s all automated!